|
|
|
Table of Contents
(click
on underlined sections to go directly to them):
|
|
|
|

|
|
Mental and Physical Acuity
- Are you able to concentrate and work safely?
- Never work while tired or taking medication.
- Try not to rush the job.
- Be aware of your attention or lack of it to the job – repetitive cuts can
lend themselves to day dreaming.
- Avoid distractions – never surprise someone who is working with tools.
- Standing on a concrete floor for long periods of time can tire leg &
back muscles. Reduce muscle strain by laying a resilient rubber anti-fatigue
mat (available at industrial tool supply stores) or a piece of foam-backed
carpeting on the floor in front of your work area. Wear sturdy, quality work
or athletic shoes, and have a stool to further reduce fatigue.
Back to the Top
|
|
General
Environment Safety Check List 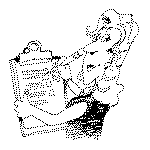
|
Make sure your work surface is at a comfortable height with plenty of room
to set out your tools and workpiece.
A fully equipped First-Aid box should be present and readily accessible in
every workshop.
No open flames or tobacco smoking!!
Evaluate the lighting conditions in your workshop:
Adequate lighting is necessary to the safe use of sharp hand tools or the
operation of power tools. Shadows and dim lighting increase fatigue and
contribute to measurement errors.
Protect light fixtures from flying wood chips by covering them with metal
window screening or wire mesh.
Make sure that a grounded outlet of correct amperage for your power tools is
close by. This outlet should be below the level of your work table so that any
electrical power cords will not interfere with work. Keep all electrical cords
and extension cords free of entanglement with loose materials. Be certain all
power cords are not worn or damaged but in good repair.
Keep the floor area clear and wipe up all spilled liquids immediately to
prevent a slipping hazard.
Ensure that you can easily and safely work around your bench – no sharp
edges or corners sticking out.
Use a mask or respirator to protect against the toxic vapors from oil-based
paints and solvents, and sawdust. This can prevent lung irritants and disease.
Store and arrange tools and equipment safely, securely, and conveniently.
Bag up and remove dust and debris frequently – especially rags that are
used for finishing.
Look over your wood stock, inspecting for loose knots, twists, cupping, or
wet lumber. These conditions can cause trouble, especially with power tools.
Back to the Top
|
|
Clothing and
Protective Gear
|
- Dress properly for your own physical protection. Use a leather apron,
leather glove, and thumb guard. Clothes should not be loose enough to get
caught in moving tools.
- Remove all rings, bracelets, necklaces, etc. Keep loose hair and sleeve
cuffs tied back out of the way.
- Always wear protective glasses or goggles. Grit and sparks can penetrate the
eyeball.
- If your work is noisy, wear ear plugs or muffs.
- Wear a dust mask to protect against sawdust and microscopic particles. Some
wood dusts are toxic and all are not good to breathe.
- Use a rigid foam head (wigs) to store safety equipment. Put the head in a
noticeable place as a reminder to use eye protection, hearing protectors, and
other safety gear.
- Tools guards and rests should be properly adjusted and used.
- Wear disposable rubber gloves when working with solvent-based liquids. These
liquids are strong skin irritants and can cause burns or blisters. Some are
absorbed through the skin and can cause serious health problems.
Back to the Top
|
|
General Hand Tool Safety
|
- Think through each operation before you execute it. Where is the knife/gouge
blade going if it slips?
- Never cut or exert pressure towards any part of the body.
- A tough glove is recommended when rasps are being used.
- Both hands should be on the carving tool with the blade hand resting on the
wood.
- Use the thumb of the hand holding your work as a pivot or guide to control
the cutting – never cut toward the hand holding the work.
- Only use a tool if it is in good condition. Keep your tools sharp.
- Always wear protective equipment such as safety glasses or goggles and dust
masks.
- Always keep your hands and limbs well clear of the cutting part of any tool.
- In vigorous mallet work, especially with very hard, brittle or old and dry
woods, eye protection is advisable.
- Never try to catch a falling carving tool. Carve in footwear strong enough
to protect your feet from falling tools.
- When sanding, use a dust mask, never blow, and protect your eyes.
- Never let children "play" with your tools or leave them alone in
your workshop.
- Do not use any tools while under the influence of medication, alcohol, or
when fatigued.
- Keep your tools in good working order, and keep your work area organized and
clean.
The primary safety considerations for power carving are: dust inhalation and
fire hazard resulting from improper dust collection and disposal.
Back to the Top
|
|
Dust Inhalation
|
|
Minuscule particles of wood dust are propelled into the air and directly at
the face, due in part to bit rotation and to the carver’s head position. These
minuscule particles hang suspended in the air for hours and any air disturbance
causes them to rise, suspend, and resettle again.
Very fine dust, when inhaled, goes right down into the deepest part of the
lungs. No inhaled dust is good for you, but some species of wood are more toxic
than others, and may also contain fungus, bacteria, and mold spores.
Continued inhalation eventually coats the lungs and the lungs try to expel
the intrusion by coughing, which causes some of the dust to clot into a mass.
Health problems such as emphysema and nose cancer can eventually develop.
The texturing process and sanding and smoothing can cause the following
problems if a dust collection system isn’t used or proper precautions such as
a face mask/respirator aren’t taken: dry throat, harsh cough, congestion in
the lungs/chest, dry scratchy eyes.
In the studio or working area, a sufficient dust collection system is the
most important consideration above all. For work that generates excessive
amounts of dust, a portion of which the collection system might miss due to size
of piece or inability to route the entire amount to the intake of the collector,
a dust mask with a filter rated sufficient for wood dust should be used.
Ventilate your workshop so that harmful vapors and fine dust particles are
blown out. For good ventilation, your home workshop should have at least 2
windows, or one window and a built-in exhaust fan.
Keep a small fan blowing either across and into the intake of the collector
or over your shoulder and into the collector intake when executing excessive
dust generating operations.
Back to the Top
|
|
Fire Hazard 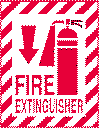
|
|
Fire hazard presents the next primary danger to an area where dust is not
collected and disposed of. Install a smoke alarm and fire extinguisher. Anywhere
dust has settled, a fire path is presented from the spark or flame source to
anything combustible within the shop. Uncontrolled and uncollected, airborne
dust particles settle and build up on any exposed area or item in the work area.
In a studio workshop, where all aspects of carving are dealt with many
situations are presented wherein a spark is generated.
A few worthy of consideration are:
- electrical motors and any heat or spark generating electrical appliances.
- switches, outlets, and light bulbs.
- sparks generated from grinding metal when sharpening tools.
- assembling metal armatures, bird legs and supports with soldering iron or
torch.
- heating elements.
- torches used for soldering and bit cleaning.
- improperly stored finishes.
- spontaneous combustion from improperly discarded or un-cared for finish
rags, brushes, wipes.
- tobacco smoker.
Back to the Top
|
|
General Safety with
Power Tools 
|
- All floor machinery and portable hand tools should be inspected and kept in
safe working order. Every item should have a proper place for storage and use,
with consideration given long beforehand to how its use will affect
surrounding areas.
- Be very judgmental when it comes to how machines are placed, set-up, and
used in your shop.
- Care must be given to each machine in its turn with respect to safety
through use, location, surrounding area, accessory use/storage, safety
devices, electrical set-up, blade/guides, and waste disposal.
- Read and study the owner’s manual. This will familiarize you with the
mechanical features, their adjustments, and general instructions for
operations the tool.
- Use whatever safety-related devices are provided by the manufacturer, such
as guards and hold-downs.
- Only use a tool if it is in good condition. Be certain the switch operates
properly.
- Do not leave any machine unattended with the power on.
- Be aware of the potential danger when operating power tools. Keep your hands
on top of the workpiece. Hold the workpiece down fair and square on the work
table.
- Make sure the power tool is properly grounded with an appropriate
three-prong electrical plug and grounded receptacle that is equipped with a
ground fault interrupter.
- Do not use any tools while under the influence of medication, alcohol, or
when fatigued.
- Keep your tools in good working order, and keep your work area organized and
clean.
Back to the Top |
|
SPECIFIC SAFETY WITH POWER TOOLS
|
|
Bandsaw
|
Always set the blade guides properly and accurately.
Feed the wood into the saw lightly and let the machine do the work. Never
direct the pressure of your hands towards the blade; keep them as far away
from it as is practical.
Make stop cuts where necessary or work away the waste in smaller pieces –
rather than getting the blade stuck in a position from which it cannot extract
itself.
Curves are cut better if you think of working from the back of the blade
rather than just the teeth.
Ensure the correct width of blade is being used for the curves to be cut,
with the appropriate tension.
Always set the safety guards correctly within ¼ inch of the wood surface
and only adjust them with the machine stopped.
Take care when coiling or uncoiling the blades – gloves are recommended.
Back to the Top
|
|
The Arbortech
|
The grinders to which the Arbortech is fitted have a no-load speed of around
11000-rpm so dust and chips are flung quite violently from the blade.
There are guards available to reduce the effect, but face masks and eye and
ear protection, as well as tight sleeve cuffs, are all necessary.
Always sharpen or adjust the blade with the machine isolated.
Back to the Top
|
|
Foredom 
|
- The cutters, burrs and sanding discs create a very fine dust when used,
especially on hard wood, so a facemask is necessary.
- Chips of wood can fly off and it is possible for a cutter or burr to break,
so eye protection is essential.
- Always use a cutter or other accessory at, or below, its maximum rated
speed.
- If a cutter is used above its maximum speed, it could fly apart, bend, or
otherwise be damaged.
- Never use a bent or damaged cutter or burr – or one that vibrates or
chatters – throw these away.
- Never force or pressure the accessories.
Back to the Top
|
|
Foredom Bits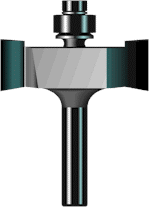
|
If a bit with a head that is made from a composition that dictates a low
speed is operated beyond its capability, the torque generated by extreme RPMs
can cause the bit to break up and break away from the shaft, sending particles
in all directions.
Bits and accessories should be inspected for cracks or flaws before use.
Never use or continue to use a bit that appears to be damaged, loose,
vibrating, or out of balance.
Back to the Top
|
|
Woodburner 
|
Don’t use excessive pressure when texture burning – learn to adjust the
heat setting to make it work for you instead of stressing the pen and tip.
Check the owner’s manual or with the manufacturer to find out whether it
is recommended that the unit be turned to full power to "condition"
new tips or to burn off carbon – some say yes, some say no.
Use care and common sense in how you clean and/or re-sharpen the pen tips.
If you use a stone, sandpaper, or a harsh abrasive, you will wear out the tip
prematurely, and in some cases, modify or hinder its former use. Use a leather
strop or buffing wheel with fine polishing rouge, and learn to work at the
lowest temperature necessary to achieve the result you want.
Always keep the unit out of the reach and away from children. Tips are sharp
and very hot, and will burn skin easier than wood.
Whenever you burn, assume a comfortable and relaxed position, with respect
given to arm, head, body, and leg position. For example, if you begin to feel
stress in the back of your neck, change the angle you are holding the work, or
adjust the height of your seat to relieve the strain.
Always work with sufficient quantity and quality of light. Use a shadow
light that creates a shadow with each stroke, making it easier to place and
register strokes.
Turn the unit OFF whenever you leave it – not only will you avoid a fire
hazard, but you will prolong the life of the burning tip. Most burning tips
will heat the tip to operational temperatures in less than thirty seconds –
time well spent when considering the possible alternatives that could occur by
not turning the unit off.
If a unit begins to make noise or buss, turn it off, allow the pen to cool,
and change pens. Usually, an occurrence such as this is indicative of a
shorted pen. If the noise continues with a new pen, you should contact the
manufacturer to ascertain the cause of the problem and/or make arrangements to
return the unit.
Keep wood scraps available to check heat settings and to practice strokes.
To maintain uniformity, the test piece should be the same type of wood as the
carving you are, or will be working on.
Back to the Top
|
|
Modifying or Creating Tools 
|
- The shape of carving tools can be modified while they are cold, while
being heated, or through a combination of both, depending on what is needed.
- The woodcarver’s environment tends to be dry and contains inflammable
wood chips, finishing agents, etc. Work away from these items.
- Never leave a naked flame unattended. Keep water, fire extinguisher, or
fire blanket near by.
- Make sure a source of heat is safe before using it. Do not clamp a hot
torch to a wooden surface.
- Have good ventilation – fumes arise from the use of torches and other
heat sources, as well as from quenching blades in oil.
- Remove the wooden handle completely before heating up a blade. Even is it
does not burn the handle, an expanding tang may loosen the hole.
- Sharp tools left champed in vices with their tangs and edges exposed are
very dangerous.
- Eye protection, if not a whole face shield, should be worn.
Back to the Top
|
|
Shellac, Oil, and Wax
Finishes Safety

|
Follow all instructions and advice on packages, especially with bleaches and
other caustic finishes.
Use and store turpentine, spirit-and-oil-based stains, as well as all other
finishes, in well-ventilated areas.
Keep containers closed when not in use; keep them away from children, heat,
and naked flames.
All brushes should be cleaned properly, and used rags sealed in plastic
bags, and disposed of away from the workshop.
Avoid inhaling the vapors, or allowing vapors to contact skin and eyes.
Hands soiled with oil-based paints and stains can be cleaned with ordinary
salad oil. Never use kerosene or mineral spirits, or other solvents to wash
skin because the hazardous materials are skin irritants and can be absorbed by
the body.
Back to the Top
|
 |
|
Keep a well-stocked basic First-Aid Kit in your shop where it can be reached
easily. Always replace what you use as soon as possible. Carvers should always
be up to date on their tetanus shots.
Equip your kit with:
- A variety of bandages
- Needles and tweezers
- Antiseptic ointment
- Cotton swabs
- Cotton balls
- Eye drops or eye bath & wash
- A first-aid handbook
- A chemical cold pack
- Elastic bandages
- First-Aid tape
- Sterile gauze
- Scissors
Possible Injuries:
Cut or stab to the hand or finger:
- Cover the entire wound with a thick sterile or clean cloth pad.
- Press firmly on the entire wound for 10 minutes without releasing pressure.
- If possible, raise the injury above the level of your heart.
- When bleeding stops, wash the wound with warm water and soap.
- Apply antibiotic ointment and cover wound with an adhesive bandage or clean
gauze.
Cut off finger or thumb:
- Cover the entire wound with a thick sterile or clean cloth pad.
- Apply direct pressure to the wound.
- If possible, raise the injury above the level of your heart.
- Seek medical attention immediately!
- If bleeding doesn’t stop, apply a tourniquet.
- Wrap the amputated part in a cold, damp cloth, but do not place in water.
- Place the wrapped part in a plastic bag, and put the closed bag inside a
second container full of ice.
- Avoid direct contact between the part and the ice.
Tore off thumb/finger nail:
- If the nail is not detached – put it down and place a band-aid on.
- If the nail is detached – use antibiotic ointment and band-aid to let the
nail grow in under it.
Tore off piece of skin:
- If there is a flap left – place the flap back and apply direct pressure.
- Use ice in a paper towel or cloth to help stop the bleeding.
- If needed, go to emergency to get stitches. If not, place a band-aid on
wound.
Inhaling paint fumes:
- Get fresh air immediately.
- If continue to wheeze, go to emergency.
- If loose conscientiousness, go to emergency.
Burns:
- Immerse in cool water until pain lessens.
- Gently pat dry with a sterile or clean cloth.
- Cover the burned area loosely with a sterile or clean dry cloth.
- If skin is tingling or has no feeling go to emergency.
For any serious cuts, punctures, burns, or other injuries, seek medical help
immediately!
Back to the Top
|
|


|
|